Pages

Friday, 28 March 2014

Flourless Chocolate Cake with Orange Cream

Chocolate is an amazing thing. It brings people together, in ways that nothing else can.

Flourless Chocolate Cake with Orange Cream | Svelte Salivations

Physically, I mean. It literally drags everybody to one spot - where the chocolate is. 

I've witnessed this a few times over the last few weeks, during my placement in intensive care. There's a lot of sick patients, but they do a really good job of looking after them there, and patients' families and friends are very grateful. So, it's not uncommon for them to show their appreciation, often in the form of chocolates.

Because there's so many patients, so much going on, so much to do, and so few staff, everyone working on the ward is busy almost all the time. That makes it near-impossible to gather everyone up for the ward round, or to co-ordinate a plan that involves more than 2 people (sometimes even finding just one other person is hard!)

You'd have to run up and down the corridors a few times, ask a couple of people, make a lot of phone calls, send someone halfway around the hospital... and you might be semi-successful.

Chocolate, on the other hand. When there's chocolate at the nurses station on the ward, people will just come... from all different directions... from all different corners... not matter what they're doing... You don't even have to make an announcement. People just know. It's like a chocolate-sensing sixth sense. It's amazing.

Tesco 74% Plain Chocolate | Svelte Salivations

This is a gluten-free chocolate cake recipe that I found on My Baking Addiction by Jamie. My friend is sensitive to gluten, and although she can tolerate the odd slice of cake, I thought it'd be nice to try out a recipe that means she won't have to worry about the consequences later on.

I've pretty much used the exact recipe (there are only so many ways to combine 4 ingredients together), just tweaking it ever so slightly. Then I added a lovely light orange cream to really lift this cake, as gluten-free flourless cake recipes do tend to come out denser.

Flourless Chocolate Cake with Orange Cream | Svelte Salivations

I filled my jars about 3/4 full and they puffed up beautifully in the oven. I almost though they were going to topple over and spill! But they die right down when you take them out and cool. 

One thing I noticed was that they tasted great practically straight out the oven (I let it cool enough to not burn!) because they were very moist and rich. However, the next day, when they had cooled completely, they were a bit on the dry and too crumbly side. I realised that the jars insulate the cake very well, and keeps on cooking the cake for quite a well. So my tip is to just underbake the cakes if you're not eating them right away!

Flourless Chocolate Cake with Orange Cream | Svelte Salivations

The orange cream was inspired by the beautiful orange sunset colours on the packaging of the chocolate! 

All I did was whip up some whipping cream, add a few tablespoons of icing sugar, and the freshly grated zest of an orange. That's enough to give it that light orange tinge - all natural! no added flavourings or colourings! 

The orange and chocolate combination was perfect - fresh fruity citrus zing with rich and indulgent chocolate cake. My sister summarised the taste like this: "It taste like Club". And that's exactly what it tastes like. 

Full recipe -->

Tuesday, 25 March 2014

Vegetarian Kimchi Rice Burger

Vegetarian Kimchi Rice Burger | Svelte Salivations

The Guardian recently wrote an article titled Crisis in Korea as younger generation abandons kimchi. It's certainly a shocking title, and I panicked internally that there would be no more kimchi anymore. To my relief though, the abandonment refers to the fact that today's generation of Koreans are (unknowingly or not?) consuming kimchi that is imported from China, rather than authentic local Korean-made kimchi.

Interestingly, the article claims that most Koreans are none the wiser that the kimchi they are being sold and served is often Chinese (due to it being cheaper). That's good news to me because, having never been to Korea and eaten kimchi made by a true Korean, there would be no way for my taste buds to know the difference, and I can happily buy kimchi sourced from anywhere without worrying about an unauthentic taste.

Of course, it is a shame that most exports of kimchi are not from the country of origin, because it is supposed to be the national dish. I can see why the 'traditionalists' are fighting hard to keep kimchi culture going in Korea, and not lose the market to the Chinese giants.

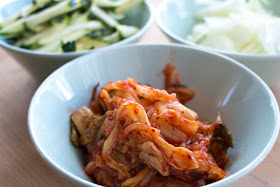
Kimchi | Svelte Salivations

I went to my local Chinese (!) grocery store, and they only sell one brand of kimchi - Chongga. This is actually a product of Korea, and a bit of Googling research led me to understand that it is a massive South Korean company. 

Yay for supporting Korean kimchi! ;)

My usual kimchi-related dishes are kimchi fried rice, kimchi noodles and kimchi pancake. Which are all delicious, but I wanted to try something different.

Fluffy white rice | Svelte Salivations

Apparently there is a new food craze across the pond in New York [citation needed] involving ramen and burgers. While I haven't tried or seen that yet, I've met the rice burger. This was very popular in Hong Kong a few years back, I think due to a Japanese trend? It was even available in Hong Kong McDonald's!

Makiko Itoh at Just Bento and Sonia at Nasi Lemak Lover both show you how to make a rice burger, but recommend you use Japanese short grain rice. I don't have short grain rice at home, and it is relatively more expensive to buy it, so I've attempted (and succeeded!) to make it with Thai long grain Jasmine rice.

Forming rice patties for rice burger | Svelte Salivations

I think the key was to mild it while it was still warm, press it down gently but firmly - really pack it in! - and then to chill it afterwards.

Vegetarian Kimchi Rice Burger | Svelte Salivations

I boost the amount of kimchi filling and give it a bit more substance, I fried some sliced onions and zucchinis with the kimchi. There's room for variation here, add whatever vegetables you've got at home instead - capsicum (or peppers if that's what you call them), carrots, potatoes, leeks...

Or even, for all you people out there who can't survived without meat, add some sliced beef / pork / chicken! It's a burger, fill it with whatever you want!

Just keep the kimchi. That's a must.

Vegetarian Kimchi Rice Burger | Svelte Salivations

Oh, and a runny egg.

It is divine!

Do note though, it isn't the easiest thing to eat. I mean, even normal burgers create a mess, so this one's just the same. Or maybe messier. ;)

Vegetarian Kimchi Rice Burger | Svelte Salivations

Enjoy! And lemme know what you think!

Full recipe-->

Saturday, 22 March 2014

Creamy Leek and Potato Seafood Chowder

Chunky Leek and Potato Seafood Chowder | Svelte Salivations

I got woken up early this Saturday morning by a parcel delivery. My bell makes a really loud angry buzz noise, and it startles me every time. It also makes me think that the person at the door is angry and impatient (but they're always just lovely, well mostly...), so I scramble to the door phone as fast as I can every time.

I'm in an upstairs flat in a building without lifts, so I feel bad for making the post man / courier man / delivery man walk all the way up just to give me my stuff. This means that I gotta go all the way down to get it.

In mah PJs.
Half asleep.
With real (non-sexy) bed hair.

So after the excursion down to the front of the building (with me running down because I worry that if I make them wait, they'll leave) and then back up again, I'm wide awake.

What do you do when you're up early on a weekend? 

I decided to head down to the local market, which I don't get to do during the weekdays. After walking around a couple of fruit and vegetable stores, and deciding that nothing was terribly exciting (as in exotic or at least uncommon), I picked up some cheap and fresh deals instead.

What caught my eye were some beautiful bright green firm leeks. I haven't had leek in a while, but it's one of my favourite vegetables. Inspired by the wintry gusts of wind this morning, I picked up some more winter vegetables (isn't it supposed to be spring already!?) to make a soup. Or a chowder, as it were. A seafood chowder, with fish and crabmeat.

Chopped winter vegetables for chowder | Svelte Salivations

While I love a good leek and potato soup on its own, I find adding some fish gives it another dimension. The only problem is that it significantly increases the price of this dish... #studentmoneyproblems

I popped into Tesco to have a look anyway, and found some kippers for £1.15 - i.e. £6.49 a kilo! Kippers are smoked fish (similar to smoked mackerel I think) but need to be cooked again before eating.

Kippers poached in milk | Svelte Salivations

The instructions on the packet say to boil them in the bag in boiling water for 15 minutes. I adjusted this in order to get maximum flavour out of the kipper into the chowder: I poached them out of the bag in some milk, and then reserved the milk for the chowder. My kippers also came with a knob of butter, which I chucked in as well, but that's probably optional. The smell of this cooking was incredible - smoky and fishy, but in the best way.

The rest of the chowder is pretty straight forward. The hardest part, to me, is the chopping. You gotta slice up the leeks (and wash them thoroughly to get all the sand out) into discs, dice the onion, and peel and cube the potatoes and carrots.

Then it'll all go into a pot and cook.

Pot of vegetables for chowder | Svelte Salivations

It looks like quite a lot here, and it is! The higher your vegetables to liquid ratio, the thicker, creamier, or chunkier your chowder will be.

There's not much to it after this. Just add stock, mash / blend (or don't), add your kipper infused smoky milk, and stir in your kipper bits.

As an added bonus, I added in a can of crabmeat. Because it's not really seafood chowder if you've only got fish - it's fish chowder.

Creamy Leek and Potato Seafood Chowder

I love crab, and canned crabmeat is a far cry from the real deal, but it's affordable, and convenient, so I use it. It's no good for dishes where crabmeat is supposed to the star, but in this chowder, it works brilliantly. You're not relying on the crabmeat for flavour, but texture, as it makes the chowder nice and thick and chunky, and really adds to it feeling like a filling meal (especially if you've blitzed the ritz out of the vegetables!)

This winter soup will warm you from the inside ;)

Full recipe -->

Tuesday, 18 March 2014

Warm Poached Egg Breakfast Salad

Poached egg breakfast with a salad of kiwifruit, cherry tomatoes, spinach and halloumi cheese | Svelte Salivations

I like to pretend I'm somewhere hot and sunny with breakfasts like these. I associate fruit salad type breakfasts with summer mornings on the beach, so refreshing and so energetic!

It's so much better than toast. Or cereal. Or porridge.

Even a Full English.

Poached egg breakfast with a salad of kiwifruit, cherry tomatoes, spinach and halloumi cheese | Svelte Salivations

I think I've just upset the entire 50 million or so population of England by saying that, I'm sorry! But I still have mixed feelings about the heavy meal that is a fry-up... I find that all the oil and meat doesn't always agree with me first thing in the morning!

Although I do appreciate something hot, even just warm, in the mornings. The best way to dethaw yourself after waking up to a cold room is to warm from the inside.

Poached egg breakfast with a salad of kiwifruit, cherry tomatoes, spinach and halloumi cheese | Svelte Salivations

So I get the pan out and heat it up, standing right next to the stove to make maximum use of any escaped heat. First thing in the morning is not a good time to be doing dishes, so keep your equipment to a minimum by choosing a tallish pan that's not too wide.

Fill with boiling water from the kettle, (I like to stand near that too when it boils, and let some of the steam soothe my face - cooled steam of course, wouldn't want to burn myself!) and gently simmer it in the pan.

Poach the egg: Gently but swiftly draw circles around the pan with a wooden spoon to create a whirlpool at the middle. Crack in an egg right into the middle of the whirlpool and cover the pan with a lid. Simmer for 90 seconds, then remove with a slotted spoon. This gets you a nice runny yolk.

Poached egg breakfast with a salad of kiwifruit, cherry tomatoes, spinach and halloumi cheese | Svelte Salivations

It's just beginning to thicken, and looks like lava that's the colour of happiness.

Make two, because one's not enough. ;)

Leave them on a plate to rest and drain. Also drain your pan of the water, and wipe it dry.

Replace the dry pan onto the heat, and turn to medium. Now, we grill: Or pan-fry. (I need a griddle pan, so I can pretend to grill!) Add oil, let it heat up and drop in some cherry tomatoes to the sides. Then, slice up your halloumi cheese into thinnish chunks, and place those into the pan too, in the middle. Brown the cheese on one side, then flip to do the other. Keep an eye on your cherry tomatoes too, spinning them around so they heat up and blister. It's done when the halloumi is browned, the cherry tomatoes can be served at whatever stage they're in.

Poached egg breakfast with a salad of kiwifruit, cherry tomatoes, spinach and halloumi cheese | Svelte Salivations

Dish it up: Line the bottom with some fresh baby spinach leaves, then layer on the halloumi and cherry tomatoes. Peel, slice, and add a few kiwifruit discs, and then finish with your two poached eggs on top!

Now sit back, relax, and enjoy your (mental) flight to a tropical island of your choice, with this warm poached egg breakfast with a salad of kiwifruit, cherry tomatoes, spinach and grilled halloumi cheese!

Sunday, 16 March 2014

Salted Caramel Mud Cake with Caramel Spikes

I can't remember where and when I first tried salted caramel. All I remember, was that it was everywhere, in everything, and I loved it.

I would hunt out salted caramel cupcakes (obvious choice), salted caramel cookies, salted caramel brownies, salted caramel macarons, salted caramel ice cream... Not that they really needed hunting out, because lucky for me, everyone else seemed to be obsessed with them too =)

Salted Caramel Mud Cake | Svelte Salivations

It was a while though, before I attempted making anything with salted caramel. I was very intimidated by the idea of having to make the caramel myself. It seems like ready made caramel in a tin or that dulce de leche stuff I keep hearing about is not ready available here in the UK.

The first salted caramel food item I made was a chocolate cookie filled with salted caramel. I cheated and just bought hard chewy caramels to wrap in the middle. While it worked (and was delicious!) they were very chewy once cooled. So I set out to make my own salted caramel sauce for the next recipe: salted caramel cheesecake.

It definitely wasn't as hard as I had imagined to make caramel, so I decided to hone my skills with a salted caramel cake.

Salted Caramel Mud Cake | Svelte Salivations

Mud cake is by far my favourite kind of cake. I love the dense, moist, rich texture of the cake. It lends itself perfectly to quality chocolate cakes, but I thought it would be amazing with caramel too. I decided to go with these recipes from Taste.com.au and from Belinda at The Moonblush Baker.

Ingredients for Salted Caramel Mud Cake | Svelte Salivations

It requires some melting of the wet ingredients first, so this is a recipe that takes just a bit longer of your time. Time that's definitely worth spending though!

I usually use very cheap normal chocolate when I bake (in recipes that call for chocolate rather than cocoa powder) because I find that once everything is mixed together, it makes very little difference. However, I spotted this beautifully packaged Tesco finest* Cook's White Cooking Chocolate, and was  persuaded to give it a go. Made with cocoa butter from Ghana and Ivory Coast, and vanilla from Madagascar, this looked like the real deal!

Tesco finest* Cook's White Cooking Chocolate

With everything butter, sugar, white chocolate, golden syrup, vanilla bean paste in a pan, pour over some hot milk and heat gently over a low heat. Keep stirring until it's melted and smooth, making sure nothing sticks to the bottom and burns.

You'll want to set that aside until it cools completely to room temperature.

In the meantime, try not to drink all of it!

Ingredients for Salted Caramel Mud Cake | Svelte Salivations

Then, beat in your eggs one at a time, and mix with the sifted dry ingredients. I baked mine in a 20cm round springform pan lined with baking paper.

I find mud cakes turn out best when cooked at slightly lower temperatures than normal and for longer, so I baked mine at 150˚C for 45 minutes. When you test this cake, you're aiming for just undercooked, rather than overcooked, so test at about 40 minutes, and take it out when there's still a smidgeon of cake crumbs sticking to your cake testing instrument of choice.

Let it cool for a bit in the pan (that will finish off the cooking process) for 15-20 minutes, and then turn it out to cool on a wire tray. Now you have to let it cool completely before cutting into it.

Salted Caramel Mud Cake | Svelte Salivations

I cut mine in half so I could fill with icing and caramel sauce.

If you want to cut down on the filling (which is very sweet, in the best way) then just level off your cake, and do one layer. But if you want the full experience, then getting layers and layers of salted caramel buttercream and salted caramel sauce in is the way to go. YOLO, right? ;)

Salted Caramel Mud Cake with Caramel Spikes | Svelte Salivations

The caramel sauce is made by heating up some sugar, and letting it melt and cook and turn a beautiful dark amber brown colour. Then add some heavy cream to stop it cooking and to thin it to your desired consistency. I recommend something thicker, so it is easier to spread a generous layer on your cake. Salt to taste. 

Then using the rest of the sauce is incorporated into buttercream icing that is all ready to go. Use that the stick the layers together and to cover the surface of the cake. 

Salted Caramel Mud Cake with Caramel Spikes | Svelte Salivations

Don't the layers look amazing? If you pour over the caramel sauce when it's just warm, over the cut surface of the cake, it gently seeps in, enriching your cake and making it seem like it's oozing caramel!

I also added caramelised spikes for a finishing touch. It's inspired by these Caramel-Dipped Hazelnuts by Martha Stewart, but instead of using that recipe, I just dipped these in the caramelised sugar I made for the sauce, but before I added in heavy cream.

Caramel Spikes | Svelte Salivations

Just take the pan off the heat when all the sugar is melted and use the caramel then. If it starts to get too thick, then put the pan back on a low heat, much lower than you were using to cook the sugar. This is so the sugar heats up and becomes runny enough to use again, but doesn't continue to cook and risk getting burnt.

I didn't have hazelnuts, so I used some round Peko milk caramels I had.

Peko milk caramels | Svelte Salivations

Just stick a toothpick in them or anything round and of a similar size, and carefully dip into the melted caramel sugar.

BE CAREFUL. The caramel is incredibly hot so take a lot of care to not burn yourself!

Then lift it up gently and let the drips of caramel dry mid air. When it is set in place, you can place it down and do the next one.

Decorate as you wish!


Salted Caramel Mud Cake with Caramel Spikes | Svelte Salivations

SALTED CARAMEL MUD CAKE WITH CARAMEL SPIKES by
Salted caramel. Mud cake. Need I say more?

Makes 1 cake with 12 slices. Bakes in 45 minutes, but you'll a couple extra hours to prep and assemble.

What you need:

  • 200g butter
  • 200g white chocolate
  • 150g light soft brown sugar
  • 1 tablespoon golden syrup
  • 1 teaspoon vanilla bean paste
  • 150mL warm milk
  • 2 eggs
  • 150g plain flour
  • 150g self-raising flour
  • 1 teaspoon salt
First do this:
  1. Preheat oven to 150˚C fan forced (170˚C normal) and line your cake tin with baking paper. I used a 20cm springform tin.
  2. Place butter, white chocolate, sugar, golden syrup and vanilla in a pan. Pour over the warmed milk, and melt everything over a gentle heat. Keep stirring to make sure nothing gets stuck to the bottom of the pan and burns. Once it is all melted and smooth, take off the heat and allow to cool to room temperature.
  3. When the mixture is cooled, add one egg to the mixture, beating really well, then add the next, beating well again.
  4. In a large bowl, sift in the flours and salt. Create a well in the middle of the dry ingredients, and pour in some of your wet mixture. Using a whisk, stir the wet mixture in a small circle, bringing in flour a little at a time. Keep adding the wet mixture into the well a little at a time, to ensure easy lumpless mixing, until it is all combined.
  5. Pour the cake batter into your prepared tin and bake for 45 minutes. Aim for just undercooked, so take the cake out of the oven when you still have a few moist crumbs on your cake tester. 
  6. Let the cake sit in the tin for 15 minutes, before turning it out to cool on a wire rack.
Then you need to make some caramel, for the spikes, the caramel sauce and the buttercream. So grab:
  • 200g sugar (any type - granulated or caster, brown or white - shouldn't matter)
  • 12 round milk caramels, hazelnuts, anything of that size/shape (maltesers?) to act as foundations for the caramel spikes
  • 150mL heavy cream (but you may use 100-200mL)
  • sea salt to taste
  • 100g butter, softened to room temperature
  • 200g icing sugar
Then you can do this:
  1. Bring the heavy cream out to sit on the kitchen counter. This is allow it to come closer to warm temperature while you melt the sugar.
  2. Dump all the sugar into a tallish pan (for safety reasons!) and gently swirl it around so it forms a even layer. Start on a very low heat for 2-3 minutes, then up the heat to low for another 2-3 minutes, then up to medium low. The point of this is to slowly bring the pan up to a medium low heat, so there aren't any hot spots on the bottom of the pan. Don't touch the sugar at all, and wait for it to melt. This can take 10 minutes or so. When you start to see it liquefying, still don't touch the sugar! At a low heat, the sugar won't burn quickly, so you can leave it to work itself, as fiddling can cause recrystallisation. When the entire bottom layer has liquefied, then you can softly swirl the pan to allow the top layer to contact heat. Or, with as few strokes as possible, use a wooden spoon to pour the liquid sugar over the unmelted sugar.
  3. While waiting for this, stick some skewers or toothpicks into your round spike foundations. 
  4. When all the sugar is melted into liquid, stir constantly until it turns amber brown. Stirring now is important to prevent burning.
  5. Once the colour is darkened (but before burnt!) take it off the heat. Time to make the caramel spikes: With your thing-on-a-stick, hold the empty end and carefully dip and swirl the round end into the caramel so it gets coated. Lift gently out of the caramel, and let the drips cool mid-air. I find gently blowing onto the caramel stream can help. Once set, you can rest it down and do the next one. If the caramel gets too hard at any point, just return it to a very low heat to rewarm, but not to carry on cooking.
  6. When you're finished with the caramel spikes, we can then make the caramel sauce: Make sure the caramel is nice and runny, put the pan on a very low heat if necessary, then remove from heat and pour half the heavy cream. Beware of spluttering of the caramel, so take extra precautions! Keep stirring all the way throughout. Stir, stir, stir! If any of the caramel lumps up, try stirring for a few minutes to see if it melts back down, otherwise return to a low heat and stir over that. Depending on how thick it looks, keep adding more to thin it out. I used 150mL in total, but it will depend on personal preference. Then add some sea salt to taste. The caramel sauce is done, just let it cool now!
  7. Finally, we can whip up the buttercream: With the butter softened at room temperature, beat it (preferably with a machine) for a few minutes to get it nice and soft and fluffy.
  8. Sift in the icing sugar a bit at a time (add too much and the icing sugar will puff back up into your face!) and beating it all in.
  9. Drizzle in the cooled caramel sauce (make sure it is cooled!) and then beat to mix. It should be beaten to a light consistency that holds its shape. If needed, milk or heavy cream can be added to lighten it up.
With all this done, you can then assemble it together:
  1. Cut your cooled cake in half horizontally. If it's a bit domed on top, just flip it upside down to get a flat surface and make full use of your cake.
  2. Spread over a layer of caramel sauce onto the top of each half. This works best when the caramel is still a little bit warm, and if you spread it onto the cut surface, because then the cake will absorb some of that sauce.
  3. Spread a layer of buttercream over the bottom half (when the caramel sauce is cooled) and then place the top half on and frost the sides and the top of the cake as well.
  4. Stand the spikes into the middle of the cake, round end down, or however else you wish!

Wednesday, 12 March 2014

Twinings Earl Grey Tea Loaf Cake

British people drink a lot of tea

Excessive amounts really.

From an objective point of view, Wikipedia says the annual consumption per capita is 2.74kg, making the UK 5th highest on the list. Of course, I do not vouch for the reliability of this information, but if it was the case, that would equate to 1370 cups of tea a year, so 3.75 cups a day (Approximating that a tea bag weighs 2g) That seems like a fair bit to me, as your average cup is 250mL, so it's almost a litre!

The facts are there, guys. There's no denying the British love their tea. So why not, tea flavoured cake?

Twinings Earl Grey Tea Loaf Cake | Svelte Salivations

Earl Grey is the most popular choice for tea-infused cakes. I loved this gorgeous earl grey tea cake by Laura on Building Buttercream, but I decided that I would make mine much more simpler. Hers is a special occasion cake, mine is a everyday cake.

Earl Grey Tea bags from Twinings | Svelte Salivations

I started off with infusing the Earl Grey flavour. I use Twinings Earl Grey tea bags normally, so I just grabbed 4 of those (i.e. average daily consumption as per my calculations above).

Twinings Earl Grey Tea infused in milk | Svelte Salivations

I assumed the best way to extract the flavour would be to soak it in hot liquid. Water in large amounts is an unusual ingredient in cake, but milk is much more widely used. So I gently heated up some milk, and poured it over my tea bags to infuse for 5 minutes. Then, remove the tea bags and cool the liquid to room temperature.

Smooth room temperature butter | Svelte Salivations

I made this Earl Grey Tea loaf cake using a creaming butter and sugar method. So I took my butter out to get it to room temperature, and mashed it up a bit with a wooden spoon to make sure it was nice and soft.

Butter and sugar for earl grey tea cake | Svelte Salivations

Then I tipped in some golden caster sugar. Creaming sugar and butter by hand is not as straight forward as using a machine. At first, it seems like there isn't enough butter. So I find it easier to start by pushing the sugar into the butter, rather than aimlessly stirring it around. Then, once it seems to be incorporated, it's a matter of moving and spreading the mixture around the sides of the bowl. It takes a while of mashing and bashing, but eventually you will find that the volume of the mixture seems to have doubled, and the colour is lighter.

Creamed butter and sugar | Svelte Salivations

Make sure you do get it to a state with lots of air incorporated inside, as this relieves some of the density of the cake. The good thing is, you can't overcream, so there's no need to worry about that. Bear in mind that if you use golden or brown (as opposed to white) sugar, it will pale less, and also, if you use coarser granules, then the mixture will be grainy rather than smooth.

Add eggs to creamed butter and sugar | Svelte Salivations

Add your eggs one at a time, beating it into the butter and sugar mixture well after each addition.

Dry ingredients for Earl Grey Tea Loaf Cake | Svelte Salivations

Prep your dry ingredients by sieving flour, baking powder and salt. Add it to your wet mixture slowly, in 2 or 3 parts, so it is easier to mix and lump free.

Dry and wet ingredients for Earl Grey Cake | Svelte Salivations

This is the reason I do cake by hand sometimes. When you folding the flour with the other ingredients, you want to handle it as little as possible because physical motion is what activates gluten, something good for breads, but less good for cakes.

Using a wooden spoon, you can fold very gently, until it is literally just combined, whereas using a stand mixer, I find it much easier to go a bit overboard.

Earl Grey Tea Cake batter | Svelte Salivations

Time to add your wonderful flavour! I poured in all my earl grey tea infused milk, and again stirred it only until it was just combined.

Although the colour was beautiful now, a rich milky tea colour, I thought that it could do with speckles of the tea leaves themselves. I ripped open one of my used Twinings Earl Grey tea bags, and emptied it in. Add more if you want more speckles!

Earl Grey Tea Cake batter | Svelte Salivations

Stir.

Earl Grey Tea Cake batter | Svelte Salivations

It is quite a runny batter, at least more runny than what I am used to, but it works just fine so don't think anything has gone wrong.

It's done at this point, so all you need to do is line a loaf tin with some baking paper, and pour your batter in.

Earl Grey Tea Cake batter | Svelte Salivations

I baked it at 160˚C in my fan-oven and it was done in 40 minutes. I think it depends a lot on the depth of your cake, so just keep an eye on it. It's done when you press on the top, and it springs back, or you can check with a toothpick inserted in the middle, which should come out clean.

Let it cool in the tin for 5 minutes, then take it out and let it cool some more. I like to take the baking paper off when the cake is still warm, but not hot, as I find that has the least chance of sticking.

When it's cool, it's easier to cut into without the cake crumbling to bits.

Twinings Earl Grey Tea Loaf Cake | Svelte Salivations

TWININGS EARL GREY TEA LOAF CAKE by Sam | Svelte Salivations
A moist and dense, yet soft loaf cake for Earl Grey tea-lovers out there.

Makes 1 loaf with 8 slices. Takes 1 hour of your time: 20 minutes to prepare and 40 minutes to bake.

What you need:
  • 4 Twinings Earl Grey teabags (or any of your choice)
  • 200mL milk (I used skimmed, but any will do)
  • 100g butter, room temperatures
  • 200g golden caster sugar
  • 2 eggs
  • 150g plain flour
  • 2 teaspoons of baking powder
  • large pinch of salt

How you make it:
  1. Preheat oven to 160˚C fan / 180˚ normal.
  2. Gently heat milk in a pan until just simmering, take off the heat and infuse all the teabags in it for 5 minutes. After that, remove and set aside the tea bags, and let the milk cool to room temperature.
  3. Cream together the butter and sugar. To make it easier, mash up and soften the butter first, and slowly incorporate the sugar. Beat lots of air into it so it turns out nice and pale and fluffy. 
  4. Add eggs one at a time, and beat it into the mixture when after each one.
  5. Sieve flour, baking powder and salt into a bowl, then add 1/3 of this into the wet mixture. Fold with gentle strokes, as if you don't want to disturb it, and do the same with the rest, adding 1/3 at a time. Stop as soon as it is just combined!
  6. Pour in the tea-infused milk, and stir so it's mixed together. If you wish, stir in the contents of 1 (or more) teabags to add a speckled look to your cake.
  7. Line a loaf tin with baking paper and pour in the cake batter.
  8. Bake for 40 minutes or until done, all the while enjoying the smell of tea perfuming your kitchen.  
  9. Cool in the tin for 5 minutes, then take it out of the tin and baking paper and cool completely.
  10. Dust with icing sugar and enjoy!


Monday, 10 March 2014

Portobello Mushroom Mania: Two Ways with Eggs for Breakfast

WARNING: MORE MUSHROOMS!

Portobello Mushrooms | Svelte Salivations

That bag of mushrooms I bought doesn't have a bottom. It's a magic mushroom bag. As in, a magic bag containing mushrooms, not a bag of magic mushrooms unfortunately! ;)

So I've made dinner (soup) and lunch (sandwich) with these portobello mushrooms already, so obvious next up is breakfast!

Portobello Mushroom and Egg Breakfast Two Ways | Svelte Salivations

In order to prevent mushroom boredom, I decided to make my portobello mushroom breakfast in TWO different ways. Oh, the choices!

Both use eggs and bread and a simple balsamic reduction. Easy! So with the same ingredients, you can make:
  1. Poached eggs with sliced portobello mushrooms on toast
  2. Portobello mushroom omelette
  3. Both!
Sliced portobello mushrooms | Svelte Salivations

Slice up your mushrooms. You can use as many you like, or as few. It just depends how many mushrooms you want. Then sauté them in sizzling hot butter until all the water evaporates off. Set them aside.

Now put the pan back on a medium-low heat and pour in about 50mL of balsamic vinegar. There's no need to use the fancy schmancy stuff, regular stuff is fine - just make sure it's not the pre-mixed vinaigrette. Scrape any sticky mushrooms bits off the pan with a wooden spatula and reduce the balsamic vinegar until it's about half the volume. Reserve it in a small bowl or dish.

That's pretty much that basis of these two breakfasts. Sautéed portobello mushrooms and a balsamic reduction for sauce.

So first up, poached eggs.

Poached eggs and sliced portobello mushrooms on toast with balsamic reduction | Svelte Salivations

Simply toast some bread, butter it up if desired, and top with a layer of mushrooms. Then poach an egg and lay in on top.

Drizzle some of that balsamic reduction, which may have thickened up once cooled, on top and serve warm.

Poached eggs and sliced portobello mushrooms on toast with balsamic reduction | Svelte Salivations

Breaking into that runny gooey yolk and watching it ooze all over the mushrooms and toast is a feast for your eyes. Then taking a bite of the smooth silky egg, combined with the umami / meaty feel of the mushrooms, then the crunch of the toast, all topped with a sweet tangy balsamic sauce will be pleasure for your tastebuds.

Poached eggs and sliced portobello mushrooms on toast with balsamic reduction | Svelte Salivations

There isn't much more you want in life.

Apart from this omelette of course. ;)

Portobello mushroom omelette with balsamic reduction | Svelte Salivations

Just your standard omelette. So beat up two eggs, season with a pinch of salt and pepper, and pour into a buttered pan over medium heat. Give the pan a swirl, so that the bottom is all hidden by the egg, and let cook for 2 minutes until the edges have set, but the top isn't quick done. Sprinkle over the mushrooms on one half. Then with a spatula, or two, or with whatever works for you, pick up edges on the half without the mushroom filling, lift, and fold on top of the half with the mushrooms.

Again, drizzle with the balsamic reduction. Serve with toast.

Portobello mushroom omelette with balsamic reduction | Svelte Salivations

It's a brilliantly filling and satisfying, shroomy and eggy breakfast, that will get your day off to a bright and cherry start.

Portobello Mushroom Mania: Two Ways with Eggs for Breakfast | Svelte Salivations

Which one's for you? Which one do you want to wake up to?